The meticulous nature of precision rifle work, from chassis installations to trigger adjustments, invariably leads to encounters with damaged fasteners. Even with diligent preventative maintenance, the use of high-quality screws, and the application of proper torque, stripped and sheared screws remain an occasional reality. A recent demonstration provided a methodical approach to addressing two common scenarios: a stripped screw with an intact head, and a sheared screw broken flush with the action surface.
It is critical to note that any work involving firearm components carries inherent risks and should ideally be undertaken by a competent gunsmith. Modifications can void warranties, lead to unsafe firearm operation, and potentially cause injury or death. The techniques described are for informational purposes, underscoring the necessity for caution and expertise.
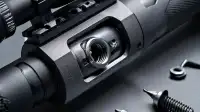
The first scenario involved a stripped screw located towards the front of a Remington 700 Police rifle. This type of damage prevents conventional removal with a wrench. An initial attempt involved tapping a larger Torx or Allen bit into the stripped recess to gain purchase, a method that sometimes succeeds. In this instance, the attempt only exacerbated the stripping.
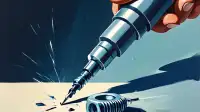
The successful approach began by selecting a drill bit with a diameter slightly larger than the screw's shank. With the rifle's action secured in a vise, a cordless drill was used to carefully drill out the screw head. The objective was to sever the head from the shank, allowing it to detach while the threaded shank remained in the action. Once the head was removed, the exposed screw shank, now without its load-bearing head, was easily grasped and backed out using a set of locking pliers. This method was noted for its consistent success over time.
The second, more challenging scenario involved a screw sheared off flush with the top of the action. Unlike a stripped head, this condition precludes using locking pliers or even attempting to cut a slot for a flat-head screwdriver, as there was insufficient material protruding. Removing a screw in this state demands precision drilling.
While handheld drills can be employed, the demonstration emphasized that a milling machine or a quality drill press represents best practice for this operation. The rifle's action was secured in a V-block, which was then clamped firmly within the vise of a milling machine. This setup provides the rigidity and concentricity necessary for precise drilling.
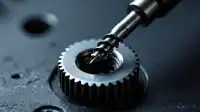
The process began with a spotting drill to accurately center the pilot hole. Following this, an undersized drill bit was used to begin drilling through the sheared screw. The key to successful extraction in this situation is patience and a progressive approach: drilling slowly and incrementally increasing the drill bit size. If the drilling remains perfectly centered within the screw, larger bits can be used until the majority of the screw material is removed. Should the drill deviate slightly off-center, creating a cut on one side, a small punch can often be used to collapse and remove the remaining screw material.
In the specific case documented, after drilling, a tap was required to clean and extract the remnants of the screw threads from the action, indicating the thoroughness sometimes necessary for full removal.
Encountering damaged fasteners is an inevitability for anyone consistently working on precision rifles. While frustrating, these issues are not insurmountable. The outlined methods, employing appropriate tools and a careful, methodical approach, demonstrate that both stripped and sheared screws can be effectively removed, restoring the rifle to operational readiness or enabling further work. For those less experienced or without the specialized tooling, consulting a competent gunsmith remains the most prudent course of action.