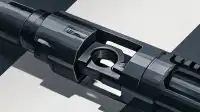

A recent custom rifle project detailed the intricate process of modifying a Ruger Mini-14, aiming to evoke a classic aesthetic, particularly the "Mini-14 GB in blue" variant, not commonly associated with its pop culture inspiration.
The build started with a Mini-14 already equipped with a Samson Manufacturing A-TM folding stock—a modern reproduction of the original, long-discontinued Ruger part. The primary focus of the customization centered on barrel work, specifically the integration of a flash hider and a front sight featuring a bayonet lug.
The initial challenge involved the removal of the factory front sight. The gunsmith noted these sights are typically press-fit, pinned, and then blued, creating a tenacious bond. After initial attempts with Kroil penetrating oil proved insufficient, a milling machine equipped with a 1/2-inch 4-flute end mill, operating at approximately 800 RPM, was employed to machine off the stubborn sight.
Once the factory sight was cleared, the barrel was prepared for threading. A Precision Matthews PM-1440 GT lathe, set up with a four-jaw chuck, was used to thread the barrel shoulder to 1/2″-28. To safeguard the receiver during this process, 10 mil tape was applied, and a crown saver was utilized in the tailstock.
With the barrel threaded, the new front sight assembly, complete with its bayonet lug, was slid into position, followed by the installation of the flash hider. Achieving precise alignment for the new front sight was critical. The receiver was leveled in a milling machine's vise, and a bayonet was used to ensure the front sight's perpendicularity to the bore. Further adjustment was aided by a spring-loaded tap guide. Green Loctite, commonly used for retaining sleeves, was applied to secure the front sight, which was then left in the vise overnight to set.
The final steps involved cross-drilling the front sight for a roll pin. An angle block on the milling machine provided stability for the muzzle end of the barrel during this precise drilling operation. After alignment, the hole was drilled, and a roll pin was tapped into place, completing the modification. The components for this project were sourced from Brownells, highlighting a detailed, multi-stage process to achieve the desired configuration.