Working with precision rifles inevitably leads to encountering damaged fasteners, whether stripped or sheared. Even with high-quality components, preventative care, and proper tools, these issues can arise. The following outlines established techniques for addressing two common problems: stripped and sheared screws. It is imperative to note that the procedures described are for informational purposes only and should be executed by competent gunsmiths. Modifications to firearms carry inherent risks, including voiding warranties, creating unsafe conditions, and potentially causing injury or death.
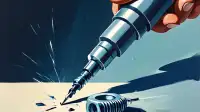
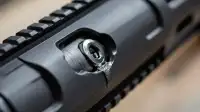
When a screw head strips, preventing conventional removal with a wrench, the initial approach often involves attempting to seat a larger Torx or Allen-style driver into the damaged recess. Tapping the larger driver into place can sometimes provide enough engagement to back the screw out. However, if this fails, the next step involves drilling out the screw head. This process entails selecting a drill bit slightly larger in diameter than the screw's shank. With the rifle action secured in a vise, a cordless drill can be used to carefully cut through the screw head. If executed correctly, the screw head will separate and often remain on the drill bit, leaving the undamaged base and shank still threaded in the action. The remaining screw shank can then typically be removed by gripping it with locking pliers and backing it out.
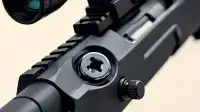
A more challenging scenario presents itself when a screw shears off flush with the action's surface, as was the case on a Remington 700 Police rifle where these methods were applied. Without an exposed head, locking pliers are ineffective. In instances where a small amount of material protrudes, a slot can sometimes be cut for a standard screwdriver, but this is often not feasible. The primary method for a flush-sheared screw is careful drilling. While a handheld drill can be used, optimal results and precision dictate the use of a milling machine or a quality drill press. The action is secured in a V-block within the milling machine's vise. The process begins with a spotting drill to precisely center the hole, followed by an undersized drill bit to bore through the screw. Patience is crucial, employing progressively larger bits. If the drilling remains perfectly centered, the screw material can be incrementally removed. Should the drilling be off-center, one side of the screw may be cut away, allowing for the remaining material to be removed with a small punch. In some cases, a tap may be necessary to clear the remaining threads.
While encountering damaged screws can be a frustrating aspect of firearm maintenance, these issues are not insurmountable. Depending on the specific nature of the damage, skilled individuals may be able to address them, or it may be prudent to enlist the services of a competent gunsmith to ensure proper resolution.